uxcell Ceiling Fan Capacitor CBB61 22uF 350V AC 2 Wires Metallized Polypropylene Film Capacitor 58x48x30mm for Electric Fan Pump Motor Generator: Industrial & Scientific
uxcell Ceiling Fan Capacitor CBB61 22uF 350V AC 2 Wires Metallized Polypropylene Film Capacitor 58x48x30mm for Electric Fan Pump Motor Generator: Industrial & Scientific
Replaced a "universal" 825 RPM condenser fan motor with a casing so long the fan blades would blow air out of the sides preventing the refrigerant from condensing fully (poor heat removal). Working on first attempt to install. A little disappointed the live lines (yellow and black) did not include connectors (minus 1 star). Wish I had the fully insulated wire crimp connectors on hand. Instead, I used the non-insulated type and just wrapped them in tape. Fan purrs like a kitten and blows hot air out of the top now as it should. A/C is a few degrees cooler out of house vents with the change. Don't forget to remove the drain plug (see picture) and also check for fan blade clearance before powering it up. Set the blade clearance as small as possible without compromising clearance. Motor casing is grounded to fan shroud, so the separate ground wire is not really necessary.
Great replacement for a $600+ OEM fan on my 4T Carrier. Humming right along with no issues while running.
Kinda weird having the super long shaft going 2/3 the way down the unit, but ok.
This is a 4-wire model and my original was a 3-wire. I tried hooking the brown wires up to the two hot sides of the cap, but the compressor wouldnt start. Disconnected the extra brown wire and all is good once again. Maybe the fan was draining too much from the compressor side of the cap and causing the compressor to not have enough start-up boost? Dunno. I only play a HVAC tech on TV.
Also, the fan direction was originally reversed for my needs and I had to swap the blade connectors. So be sure to check the fan direction (blowing up/out, not down/in) if you are a DIY'r.
I got the 1/3 HP for my 4 Ton Rheen (14AJM) and it works great! Took off a star for a lack of instructions, and the mounting studs on mine were slightly off. I had to drill out the mounting holes ~1/32" to get it to mount.
Luckily for me, it came wired to turn in the direction I needed. No jumper swapping! If you are comfortable with replacing A/C caps you can replace the fan too!
NOTE: This motor requires a fan cap. If your existing system doesn't have a fan cap, you will need to get one.
Minor gripes:
- There is no connector for the wire shroud to plug into, which is fine for a universal motor. (no stars off for that) I had to zip tie mine in place.
- The wires for reversing direction are left to hang out. I zip tied mine so they don't hang down, but they are still left exposed to the elements. Not sure how long they will last exposed?
TLDR:
In the past year there were a couple of times I would be outside when the A/C would kick on there would be a noticeable lag of 20-30 seconds after the compressor turned on before the fan would start. (A minor concern) Then towards the end of last season (Late Nov. for us in So.FLA) I noticed that some of the cycles would randomly run longer than the others. Finally a week ago I was outside and the fan didn't come on at all after almost a minute. Fortunately, spinning the fan with the hose kicked it in. That's when I knew it had to be replaced.
To the internet I ran and found many good videos on YT to show how to do the replacement. And the various ways to wire it. (If you are at all unsure watch them!) In my case the old motor had a connection to the 24v circuit and it took a while to understand that it wouldn't be used on this replacement.
More hunting found the wiring diagram I attached. Which for me REALLY helped! And while I understand that the primary customer for this would be an A/C tech and that most wiring is common, I still think it is bad form to not include a wiring diagram.
Finally ordered this replacement motor, figuring at worst I would be out the $100 and still have to call for a tech. Took the old fan and shroud off and started the replacement. But the studs were slightly off and wouldn't match to any of the existing mounting holes. I measured and found ~3.65" center to center on the original, ~3.62 on the replacement. Drilling out the closest matching holes by ~1/32 over allowed the studs to go through. Then trimmed the studs and shaft with a hack saw. Finished up the wiring, turned the unit back on and it worked like a charm!
Bottom line, if you are handy and comfortable working with electrical connectors then this is a fix you can make.
My 830 rpm 1/4 motor went out! I tried a p**tech brand and it was going into thermal protection after 1-2 mins! I was so frustrated. I took a chance on getting this one before ordering the OEM and I’m glad I did! It installed with no issues!
My complaints (which are not huge)
-The wires that goes to the capacitor and contact are shorter than most that I’ve dealt with (not a HVAC TECH BTW but have a few years experience)
-Both of the 110v wires(yellow and black wires) do not have connector ends which you need if you want to install on the capacitor!
-the screws that sit on top of the unit are extra long which doesn’t hurt anything.
It's a great replacement motor after our AC went out in the hottest week of the year. Took some work to switch the fan blade over but that was getting it off the old motor. This one is a bit off balance now so it's a little louder than the old motor but we will figure it out. Sooooo much cheaper than buying from the HVAC guys and really simple installation.
Price: US $9.99
Rating: Previous / 5.0 fromReviews

Specification
[Material] - Made of metallized polypropylene film sheet with plastic shell
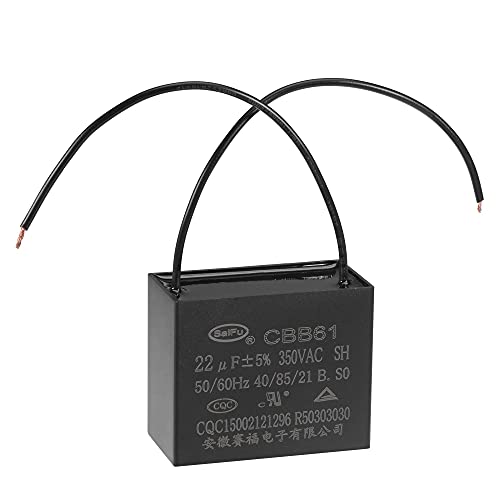
[Specification] -Rated Capacity: 22uF; Tolerance: ±5%; Rated Voltage: 350V AC; Cover Size: 58x48x30mm / 2.3x1.9x1.2inch; Rated Frequency: 50/60Hz; Climatic Category: 40/85/21
[Working Environment] - This CBB61 capacitor is applied to starting and working of single-phase motor in 50Hz/60Hz AC electric power system
[Application] - The CBB61 capacitor is widely used for ceiling fan, wall fan, stand fan, industrial fan, range hood fan, air exchange fan, water pump, motor, generator, etc
[Note] - If the ceiling fan works slowing down or cannot work or cannot work at different speeds as it used to, please check the CBB61 ceiling fan capacitor first. The capacitor may be burnt out or weak, you need to replace it with a new one
Description


Method for Replacing Capacitors:
- 1. Cut off the power first to avoid electric shock;
- 2. Discharge the old capacitor;
- 3. Install the new capacitor according to the original wiring method.
Advantage
This CBB61 run capacitor has advantages of low loss, excellent electrical performance and long service life.
Application:
The CBB61 capacitor is widely used for ceiling fan, wall fan, stand fan, range hood fan, air exchange fan, pump, motor, generator, etc.
Note:
If the ceiling fan works slowing down or cannot work or cannot work at different speeds as it used to, please check the CBB61 ceiling fan capacitor first. The capacitor may be burnt out or weak, you need to replace it with a new one.
- Material: Made of metallized polypropylene film sheet with plastic shell.
- Working Environment: This CBB61 capacitor is applied to starting and working of single-phase motor in 50Hz/60Hz AC electric power system.
Application
|
|
|
|
|---|---|---|---|
Ceiling Fan | Air Exchange Fan | Wall Fan | Stand Fan |


 Read more
 |  |  |  |  |  | |
|---|---|---|---|---|---|---|
| CBB61 Capacitor | CBB61 Capacitor | CBB61 Capacitor | CBB61 Capacitor | CBB61 Capacitor | CBB61 Capacitor | |
| Style | 2 Wires | 3 Wires | 4 Wires | 5 Wires | Single Insert | Doule Insert |
| Rated Capacity | 15uF | 5uF+5uF | 4.5uF+5uF+5uF | 4.5uF+5uF+6uF | 3uF | 8uF |
Replaced Emerson motor on heat pump. Motor is great and a fraction of the cost of a Hayward replacement. But as a universal after market unit they need to include more helpful tips for installing. Example 3 wire single capacitor cut off brown/white wire, rotation is looking at back of motor this way you can set it and sleeve up wires instead of pull above grate, mounting bolts template my old motor mounts were smaller then this one. I was lucky my grate had larger hole already their. If you have to drill new holes template would be grate. These tip would be nothing to add to a web page
Took a chance and this is a good replacement for my Emerson k55hxkdm3218.
The specifications are nearly identical except for the RPM. The Emerson was a bit higher at 1170rpm. Other than that, everything else was the same. Took awhile to get the fan blade off the old moto but was easy to install on the new motor. The new fan moto has two brown wires. One wire is brown/white. This is the reverse counter clockwise vs clockwise. Again I had to take a guess and figure to have the fan suck th air from the ground up,
In my case I had to reverse the rotation, which requires changing 2 jumper cables. I used the 3 220 wires and used cable-ties to secure the 100 wires into a loop.
- Package Dimensions:5.12 x 3.15 x 1.77 inches; 3.52 Ounces
- Date First Available:May 8, 2021
- Manufacturer:uxcell
- ASIN:B094FBP1V9
- Best Sellers Rank:#2,424,703 in Industrial & Scientific (See Top 100 in Industrial & Scientific)
- #33,514 in Industrial Electrical Capacitors
0 comments:
Post a Comment